This page will give you a quick idea of how to get started on making your masterpiece look like a masterpiece. You really do not need much technical knowledge for this tutorial but it's good you know how to add, subtract and do basic geomtery. For example tell me the area of a circle right now! For most parts i'm going to approach this as if you were an extreme noob. If you still don't get it than you can direct all your curses, hexes and swears at that idiot called OshadO or better yet make changes yourself and still curse and swear at him.
Baby Steps - The Browser
If you'd like you can skip to applying textures section which follows this section.
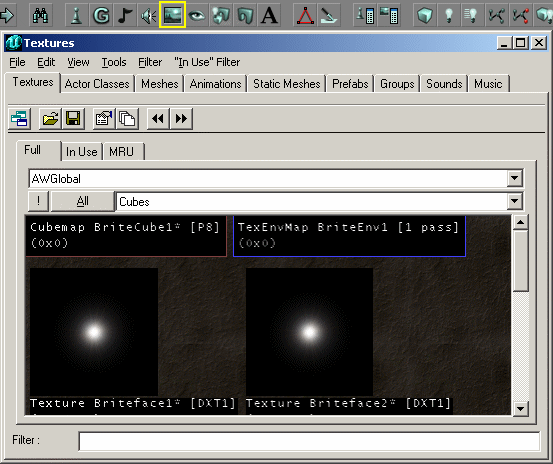
Above is the UnrealEd 3 toolbar. Click on the 5th browser button to open up the Texture Browser. You should end up with the right half of the picture below.
This is the Texture Browser. As the name implies it lets you browse textures. Lets have some fun. What you're seeing right now is the standart UT engine textures. If you look at the picture above you'll notice that there are two field with drop down menus. One says engine(terrain in the pci above) The other with the ALL button next to it might be blank. If you click on the drop down arrow that says engine(terrain in pic above) you'll see a list of other names. Click on any one and you'll see a new set of textures. These are all different texture sets used by the engine so they open up by default. Sadly none of these is really a set that you might want to use in your map unless you're going for a neo enginistic retro zam tastic look. SO let's open a new set of textures.
Do Texture Browser Menu -> File -> Open and the browser should automatically go to UT\Textures directory. There should be a ton of files in here. Say your maps is a castle themed map. So navigate to NaliCast.utx and open. You should see a whole bunch of new textures now. Plus the texture pack name should reflect NaliCast now.
If you haven't already noticed you'll also see a word in the field next to ALL, most likely it will say arch. Click the drop down arrow here and you'll see other entries like base, walls, floors, ceilings etc. These are subdivisions within the pack to allow you to navigate the textures more easily. You can view all of them if you like by clicking on the ALL button.
Other things you can try are to change the viewing size of the textures displayed. If you go to
View -> SetSize or
View -> Variable
View -> Docked will dock or undock it from the browser.
Do keep in mind that changing the display size does not affect your textures in the game world. That is an issue I will deal with in the following section.
There is one last thing I would like to point out with the texture browser. Click on a texture and it is selected. You can apply it to the ame world now. However if you look along the top of the browser window it will give you the texture name and size in actual UEd Units. Eg 128x256 WxH.
Applying Textures
This is really really easy. It's so easy that if you cannot do it there is something very very wrong with you or the way I wrote this.
Simply selcet the texture in the browser and add or subtract a brush. Tada that texture should be on all visible faces of the brush.
Now I realise that more often than not we might want each face to have differnt textures. So select th surface in Perspective View, it should highlight, and click on the texture in the browser. It should change. Alternatively you could select and right click on the surface and Apply Texture as well.
Messing Around with Textures
You can do a lot with textures. You can rotate, mirror, pan and give them properties. I'm going to link to already written articles you can read for more info over at the Texture Topics page. There are also more advanced topics covered on that page. See Selecting Surfaces for useful keyboard shortcuts when working with textures.
The above two buttons in your main toolbar allow you to pan and rotate respectively. To find out more about alignment Surface Alignment page is your best shot.
In order to give textures properties such as reflections, shadows, etc try the Surface Flags (UT) page.
Sometimes you're done texturing and you come across a texture that may be better suited to your theme than the one that you have already applied to your map. In such a case try the Texture Replacement Tool
Comments
Legal: Is there really a texture package named Terrain? I haven't found it, so either you've snitched that pic of udn, or I want a road map ;)
EntropicLqd: Needs massive refectoring now that Apply The Texture has been written.


