This page will teach you how to create an ugly but functional room.
Making a Cube
- File –> New
- If you've been fooling around in UnrealEd you'll want to work with a fresh map.
- Toolbox –> Cube icon
- On the left side of the screen there's a toolbar with a bunch of icons.
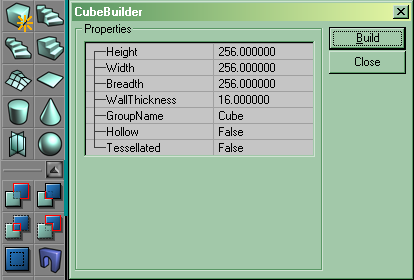
You'll see a box titled "CubeBuilder":
- Enter your size
- You can enter in just about anything, but for this tutorial we want a 256x256x256 cube.
- Subtract your space
- Just press CTRL+S on your keyboard.
Lighting
Now you have a little hollow cube. A "room" for our purposes. But it doesn't look anything like even a basic cube you'd see in Unreal. To fix that, we need some light:
- Add a light actor
- Right-click within the dimensions of your cube in any veiw (A 2D view is recommended), then click "Add light here" in the menu that pops up.
- Build the level
- Press F8 on your keyboard, and click "Build" in the Build menu that comes up.
PlayerStart
Now you have light. Your room now looks like it will in-game, but the game won't know where to put you if you try and play it now. Lastly, we need a PlayerStart:
- Add a PlayerStart
- Right-click within the dimensions of your cube in any veiw, then click "Add PlayerStart here" in the menu that pops up.
- Build the level again
- Press F8 on your keyboard, and click "Build" in the Build menu that comes up.
Now you have a finished level. Save it (File -> Save) with a DM- prefix just like any other Deathmatch level, then play (Build -> Play Level).
Back to Mapping Lessons
Page Information
2022-11-18T16:15:17.982395Z
2006-12-17T17:35:21Z
Graphik
*
https://wiki.beyondunreal.com/Legacy:Mapping Lessons/Functional Map
Attribution-NonCommercial-ShareAlike 3.0

