This page is one of a sequence of Mapping Lessons.
Next Lesson:
Overview
This tutorial offers the very simple steps needed to add and place a light actor in your map and to see the results of building the lightmap.
Instructions
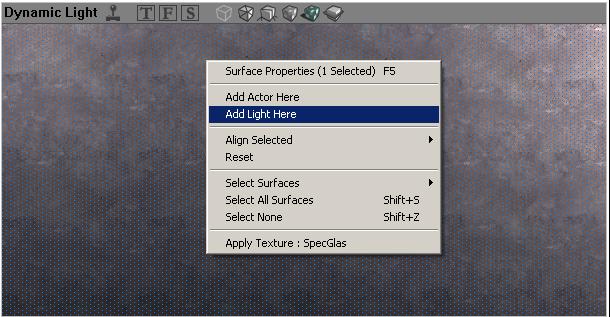
- In the perspective UnrealEd Viewport and with the mouse on the exact location of where you want to place the light, do one of the following:
- Right-click a surface in the 3D viewport and do Viewport Context Menu -> Add Light Here.
- Hold down the L key and left-click in the 3D viewport.
- Build Lighting or Build All. The map will be in full brightness until you build it.
- After you build it, clicking the Dynamic Light icon on one of the viewport toolbars will show you what effect your light had on its surroundings.
Lights can be manipulated like any other actor:
- duplicate them with CTRL-W
- move them in Camera Movement mode.
Related Topics
- Place a pickup and pickup bases in your map
- General Lighting
KFM: Was there any reason that this image was removed? Sorry guys, just going through the mapping lessons again and checking them all to see how effective they are when used by someone who doesn't know right from left yet. :D
Tarquin: I've noticed a few images missing. I suspect someone had a play with the image upload page and removed a few at random... *sigh*. But now it's gone – what would an image add to this page?
KFM: Well, when I was first starting out, it seemed that images helped me understand what I was dealing with a lot more than plain text. This one is pretty easy to grasp, though. I was just wondering as to why it was gone, because it was referenced a few times in the text above. All fixed now, though.
Guest: I am finding this hard to grasp; it seems always one step ahead of what it has told u s to do, if you know what I mean though.
Wormbo: What, do you first want a lesson that teaches you how to move the mouse and click its buttons? o_O
Guest: I just found that this was a different version of UnrealEd. Soz. o_O

