ScriptedTextures have been implemented in all generations of the Unreal Engine, but their usage differs between the various generations.
Contents
Unreal Engine 1
A ScriptedTexture(RTNP, U1, UT) can only be created statically via UnrealEd's Texture Browser.
UnrealEd 2

- Open the Texture Browser.
- Select File -> New... from the browser's menu.
- Specify a target package and texture name, optionally also a group name.
- Set the texture class to ScriptedTexture.
- Pick texture dimensions that fit your needs.
- Click OK.
As always, you need to save the package, unless you put the texture in the myLevel pseudo-package.
UnrealEd 1
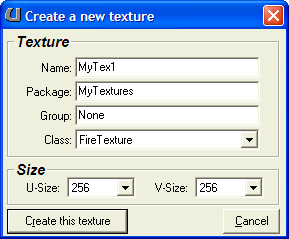
- Switch to the Texture Browser.
- Click New at the bottom of the browser panel.
- Specify a target package and texture name, optionally also a group name.
- Set the texture class to ScriptedTexture.
- Pick the desired texture dimensions.
- Click Create this texture.
Again, you need to save the package if you don't use myLevel.
Unreal Engine 2

You can create the ScriptedTexture(U2, U2XMP, UE2Runtime, UT2003, UT2004) either statically with UnrealEd 3 or dynamically in UnrealScript.
In UnrealEd
Use this method if you need a texture e.g. for a CameraTextureClient(U2, UE2Runtime, UT2003, UT2004).
- Open the Texture Browser.
- Select File -> New... from the browser's menu.
- Specify a target package and texture name, optionally also a group name.
- Use the factory class "Raw Material".
- Set the MaterialClass in the factory properties to ScriptedTexture (class'Engine.ScriptedTexture').
- Click New.
- The ScriptedTexture properties window should open automatically. Set the desired dimensions via UClamp and VClamp there.
As usual, unless you put it in myLevel, you need to save the package.
In UnrealScript
A ScriptedTexture can be created with the following code snippet:
local ScriptedTexture ST;

ST = new class'ScriptedTexture';
ST.SetSize(SizeX, SizeY);
ST.Client = someActor;
This creates a new ScriptedTexture that is SizeX pixels wide and SizeY high that is rendered through the RenderTexture() event of someActor.
Note that this example may waste resources if the ScriptedTexture will only be used for a limited duration. The UT2004 Hellbender (Onslaught.ONSPRV) provides a more efficient example for this case, using the global ObjectPool(U2, U2XMP, UE2Runtime, UT2003, UT2004) to allocate and release the ScriptedTexture used for the license plate.
Unreal Engine 3
A ScriptedTexture(UDK, UT3) is created with the following syntax:
local ScriptedTexture ST;

ST = ScriptedTexture(class'ScriptedTexture'.static.Create(SizeX, SizeY,, ClearColor));
ST.Render = RenderFunction;
This creates a new ScriptedTexture that is SizeX pixels wide and SizeY high that is cleared to ClearColor before redrawing. RenderFunction must be a function without return value that has only one parameter of type Canvas(UDK, UT3).
Usually you will want the ScriptedTexture to be specified as Material parameter.